A summary of my findings with the Stick-N-Find stickers and their usability as an iBeacon / Bluetooth LE proximity device. I ordered a set of Estimote Beacons and Stick-N-Find stickers and have been playing with automation concepts within Android. In particular, I wanted to be able to have my Android device understand the proximity to a location and have a general understanding of indoor positioning.
Note: If you just want to know how to Configure your Stick-N-Find for use in Tasker, jump to Configure as iBeacon
![]()
Needs and Alternatives
I have a fair amount of experience automating my home and life through the use of Tasker, AutoApps, Z-Wave, and custom technology, but there didn’t seem to be a whole lot of information online about automating local proximity detection with Android at the time of writing this article. Note that there are solutions for proximity detection which use the built in proximity sensor, but this is generally only useful for the proximity of a hand / object to the sensor. While this form of proximity detection can be helpful for detecting gestures like hand-waves, I was interested in more broad detection such as the proximity of the phone (without line-of-sight) to a room within a home or office building. For example, I wanted my phone to know if I was in the Living Room or in the Bedroom so when I gave it voice commands it could respond in the proper context.
While the built-in Android proximity sensor provides information about proximity very close to the device, the other end of the spectrum is technology like Geofences and GPS data. I use apps like AutoLocation which provide excellent tools that leverage the Android Fused Location provider and have been tremendously helpful for setting up Geofences that can detect rather large areas. For example, AutoLocation can be useful in detecting when I’m in my neighborhood, when I’m at my house, when I’m at the office, or even when I’m walking vs. driving.
The type of location sensitivity I was looking for lied somewhere between the proximity sensor (very near) and Geofence solutions (far). I already had tools to detect when an object was close to my device or when my device was in a particular building, but I wanted to be able to detect when my phone was in a general area like a particular room.
Stick-N-Find Stickers
Notice: This article was originally posted in 2014 and Bluetooth Smart (BLE) technology is evolving quickly. I would encourage readers to do a quick search on Amazon or Google to see if there are any newer devices with positive user feedback and ratings.
After researching a bit, I found that there were several Bluetooth LE / iBeacon manufacturers out there, but the two that came to the forefront were the Estimote Beacons and Stick-N-Find stickers. Of the two, the Stick-N-Find stickers were cheaper and seemed to be more consumer oriented. I read a number of bad reviews about the Stick-N-Find devices, but I decided I would test the devices considering there had been documented recent improvements with the firmware of the devices.
When I first received the Stick-N-Find stickers, I did like every normal consumer does and immediately started playing with the devices without reading the instructions. When I pulled the beacons out of the box, one of them bounced across my desk and beeped at me – I was a bit surprised to hear this, but I later found that the devices ship in a deep-sleep mode and tapping them 5 times on a hard-surface wakes them up. I had already done a some reading online, so I knew that I would need to update the firmware on the stickers, but the published articles indicated that you may need an iOS device to perform this update. I figured I would give it a try with the stock firmware on the Android app anyway, so I downloaded the latest version of StickNFind from the Google Play store. The 2.5 star review was another reminder of the woes other users had experienced, but I trudged ahead.
I opened the Android application and selected the ‘Pair new Sticker’ option which prompted me to hold the new sticker very close (to the phone) then select it from the list to connect. The prompt also indicated that if a sticker has never been paired before, it should be tapped 4 times to wake the sticker up which would cause the sticker to beep as confirmation that the sticker is awake. I was happy to see that the device paired quickly and was even happier to see that the Android app was prompting me to update the firmware. The firmware update took several minutes for each device, so be patient as you wait for the firmware to update and be sure to keep the phone and sticker near to each other.
Stick-N-Find App
The app worked fairly well and while I don’t intend to review the app in depth, I’ll briefly hit on the core functions. The app is capable of pairing with devices, locating devices, and notify you when a sticker is in/out of range. The first feature I tried was the Radar location finding feature. After pairing with a sticker, I opened up the radar and it showed the sticker I had just connected. When you first connect to a sticker, the app may show a spinning icon and text saying it is trying to wake the sticker. The icon next to the name of your sticker will show a spinning icon as it is trying to connect and once it is connected the icon will turn a solid blue and the “Page” feature and device status including temperature and battery life will become available. The page feature sends a signal to the sticker causing it to start beeping and flashing – both the beeping and flashing are relatively quiet so you will need to be fairly close to the device or in a relatively quiet area to hear it.
The signal strength / radar feature gives you a really rough approximation of how far away from the device you are. As you get really close to the device the signal strength approaches 100% and as you get farther away the signal strength drops to 0%. I found that when the sticker was directly touching my device I would get 99.8% strength; at 1 meter I would get between 98-99%; and at 5 meters I was usually 90%+. I would emphasize again that the signal strength is a relative measurement and can be greatly impacted by walls, bodies, metal, and other objects but it was still fun to try to track a device down and then when I was in range use the Page feature to locate the device. One thing I found is that if I selected the “Click for More Options” bar at the bottom of the screen, sometimes it would only find one of the devices (indicated by the grey/blue bar to the right of each device name). When I would then click on the device which wasn’t showing signal, I would get a message that “You can not connect to an out of range sticker”
The other feature of the app that was interesting to me was the ability to alert the user when the sticker was in range or out of range. Both features are listed under the Alerts tab of the application. The in-range feature is labeled ‘Alert Me When In Area’ and allows sounds the user-selected alarm sound whenever the beacon comes in-range (after being out of range). The out-of-range feature is called a ‘Leash’ and allows the user to set a duration that the sticker can be out of range from the phone before the alert is triggered. Both of these features seemed to work fine with the limited testing I did and seem to be part of the core focus for the target user of this device.
Other Bluetooth LE Apps
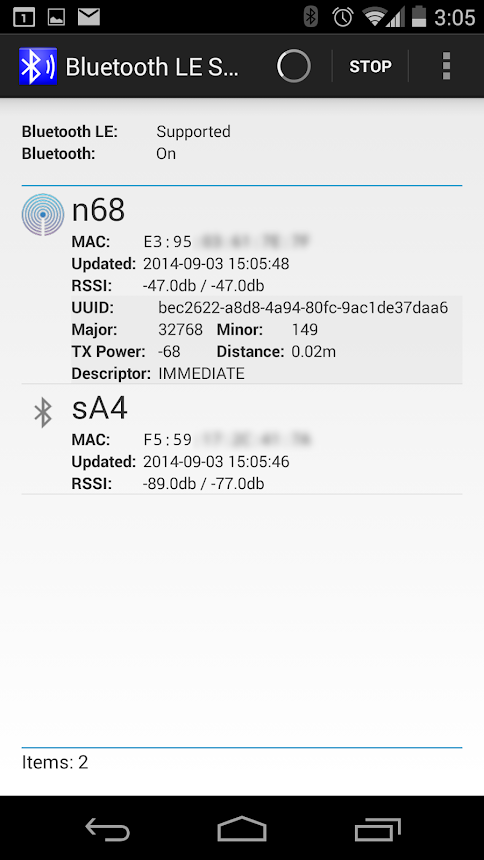 Since the Stick-N-Find stickers use standard Bluetooth Low Energy technology, you can access certain information from the devices using other Bluetooth LE apps. I first tried BlueScan and found that the scanner was capable of finding the tags when the drop-down was changed from Classic Scan to Low Energy Scan, but the descriptor seemed to be incorrect and could be related to the default output from the Stick-N-Find devices which appears to be in a proprietary format. That being said, the software was capable of finding the devices and did show some limited information. I also tried Bluetooth LE Scanner which provided much more detail and has the source-code available on GitHub. Bluetooth LE Scanner has some other cool features like the ability to export scans as CSV files and the ability to connect to a device to get additional details and then share those details via email, clipboard, etc.
Configure as iBeacon
In order to be recognized by iBeaconTasker, the Stick-N-Find sticker must be profiled as an iBeacon with a supported UUID. At the time of writing this post, iBeaconTasker was only supporting Estimote beacons and was looking at adding support for additional generic iBeacons. In order to configure the Stick-N-Find sticker as an iBeacon with an Estimote UUID, you will need to download SticknFind BeaconMaker (Android) or SNF Beacon (iOS).
Android Instructions:
- Install the SticknFind BeaconMaker app
- Open the “Beacon_Maker” app
- Select iBeacon
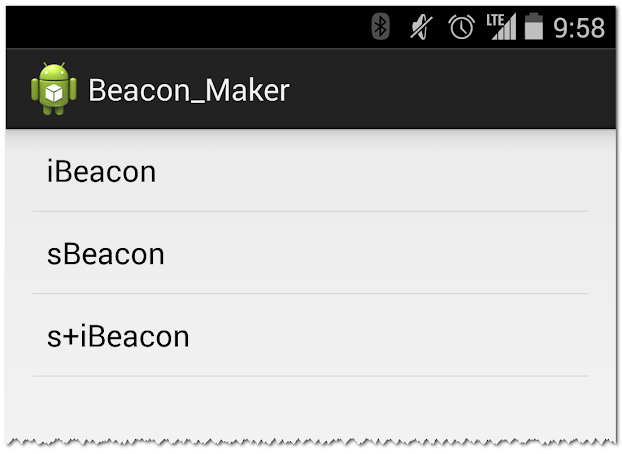
- Wait for the list of SnF stickers to populate, then select your sticker.
Note: If you don’t know which sticker is the one you are interested in, try taking your sticker with your phone and walk away from other potential devices. The ‘R’ value is an indicator of the signal and is likely the lowest value if it is closest to your phone. (eg. -30 to -50) - Change the UUID to the Estimote “B9407F30-F5F8-466E-AFF9-25556B57FE6D” and select a unique Major and Minor ID.
Warning: Make note of your current UUID in case you want to switch back to it later!
Note: The Major and Minor IDs are entered as hex values. Use an Integer to Hex converter to get the appropriate Hex value.
Note2: The Major and Minor IDs are arbitrary for our purposes, but try to use the same Major ID across all of your devices and make sure you have a unique Minor ID for each device. - If you would like to adjust the range of the Beacon down, do so now (to save battery and reduce how far the Beacon pings)
Example: I adjusted my SnF device down to -16 dBm to reduce the range so it only triggered when I was in the room and not in other rooms in the house/building. You can also adjust these parameters later and update the device again to try different values.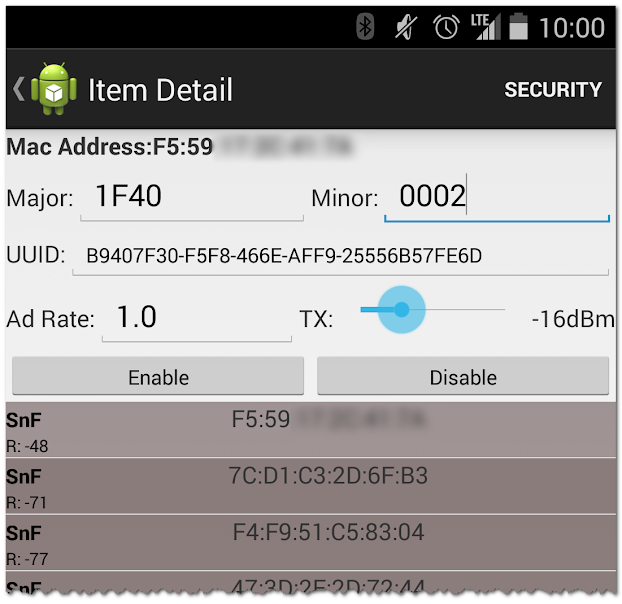
- Press the Enable button. The application may connect and disconnect from the device multiple times as it prepares for the update. If this is your first time updating the device, it may go through a several minute process (similar to the SnF firmware update) and will display a progress bar indicating the status. Make sure to keep your phone near the sticker during this time.
Note: In my case, the buttons changed from Busy > Connecting > Busy > Connecting then the progress indication popped up and the update took 3-5 minutes.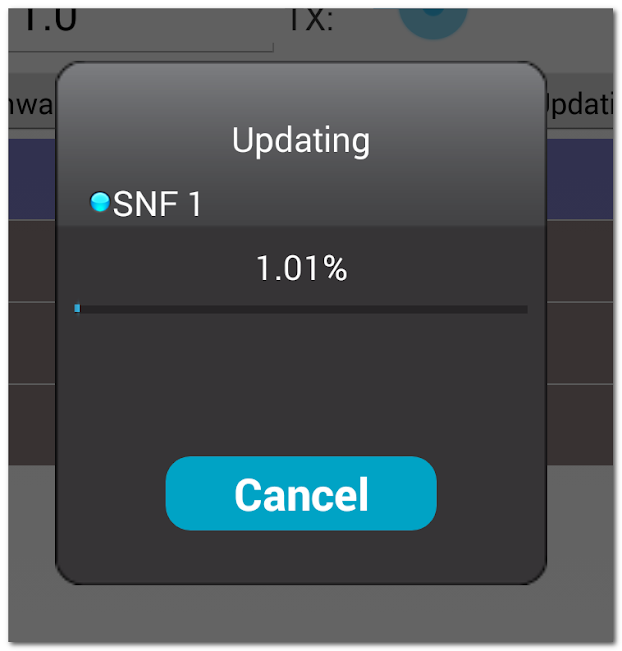
- Wait a few moments after the update is complete and you should see a success message showing “Parameters are set succesful”
- Validate that your device now shows ‘iBeacon’ where it previous showed SnF and verify that the UUID and Major+Minor IDs are displayed.
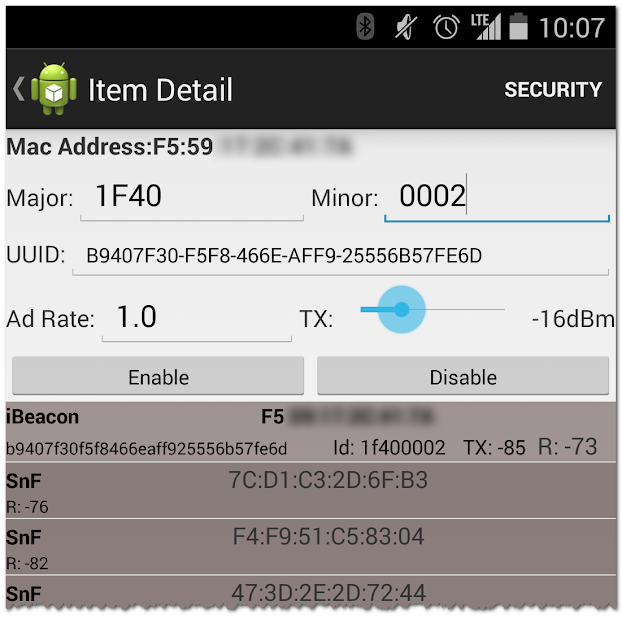
I have just started my foray into this particular part of the software, but I believe this will allow me to configure the Stick-N-Find device as an iBeacon which should make it usable with other iBeacon aware software like iBeaconTasker.
iBeaconTasker
Notice: Some users have reported that the quality of iBeaconTasker has dropped significantly and it crashes frequently. While I have not personally tested it, users of the SmartThings community have noted that Bluetooth Detection by Kanetik is a good Android alternative with great support from the developer.
Tasker is a great automation tool for android that allows the device to respond to states and events and perform various actions. There are several plugins available for Tasker that extend the type of events and states that Tasker can respond to and perform. Most of my favorite plugins come from AutoApps, but I am particularly interested in iBeaconTasker which allows Tasker to respond to the presence or lack of presence of an ‘Estimote’ iBeacon device. Out of the box, iBeaconTasker does not find Stick-N-Find devices, but once you have updated your Stick-N-Find device to the iBeacon profile and set an Estimote UUID, the plugin should recognize your devices.
Once your sticker is profiled as an ‘Estimote’ iBeacon, follow these easy instructions:
- Open Tasker
- Create a New Profile
- Select ‘State’ as the context
- Choose Plugin > iBeaconTasker
Note: make sure you have installed both Tasker and iBeaconTasker. - Click the pencil icon next to Configuration
- Select your desired ‘Estimote’ iBeacon
- Choose whether you want the profile to be triggered on when the device is Connected (moves in range) or Disconnected (moves out of range)
- Click the check mark to continue
Warning: Make sure you have disconnected the Beacon from all other apps and be sure to close any apps which might be accessing the Beacon. These apps could prevent your tasks from triggering as expected. - From the ‘State Edit’ Tasker screen, verify that your selected configuration is in place (eg. “Beacon connected” or “Beacon disconnected” is displayed under configuration) and press back to save your configuration
- From the Enter Task prompt, choose an existing task or create a new one. For purposes of demonstration, we will create a new task.
Note: At this point, your task should trigger whenever the iBeacon condition is met. If you have multiple beacons or want to be able to check the status of beacons when running tasks, you may want to set global variables - Enter a task name and click the check mark to continue.
- Click + to add an action. Select Variables > Variable Set
- Enter “%BEACON_PRESENT” as the name and “1” as the To value.
Note: This will set the global variable BEACON_PRESENT to 1 indicating that the Beacon is present. This will allow you to check the BEACON_PRESENT variable from other tasks. Make sure you also set a profile/task to set the BEACON_PRESENT to 0 to indicate the Beacon is no longer present. You could also use this variable as a place to store the ID of the most recently seen variable to make your tasks even more conditional. - Build your additional profiles/tasks and enjoy!
Leave a Reply