Azure Functions provide a flexible and easy way to run code without having to worry about spinning up servers, managing an OS, or even managing a service. For that matter, with Azure Functions you only pay when your code is running. Microsoft takes care of spinning up the servers and services to run your code and you are only charged for the time your code is actually running. The beauty of Azure Functions is you focus on writing your logic while Microsoft takes care of everything else it takes to run the code in a scalable fashion.
Note: In order to take advantage of the “pay for what you use” model, make sure you select the ‘Dynamic’ App Service Plan – the classic mode allows you to use your existing App Service resources to run your functions on your existing resources with no additional cost.
Azure Functions can be written in “JavaScript, C#, Python, and PHP, as well as scripting options such as Bash, Batch, and PowerShell.”
Azure Functions are event based in nature – there are a number of bindings for input and for output. Functions can be triggered by time events, Azure platform events, external SaaS triggers, and WebHooks (HTTP API calls). Additionally, Azure Functions make it easy to write the results of your logic back into resources like Azure Storage (Blob, Table, Queue), DocumentDB, HTTP calls, etc. The full list of input and output bindings can be found in the Azure Functions Runtime documentation under the Bindings heading.
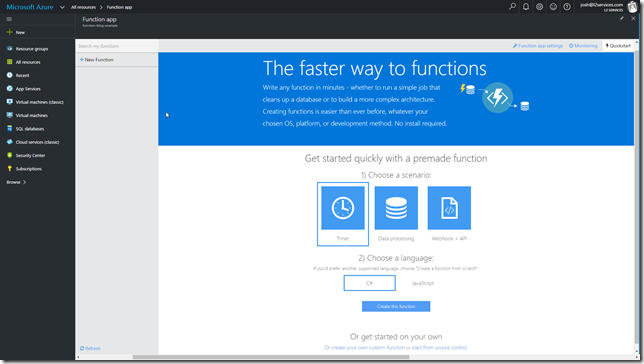
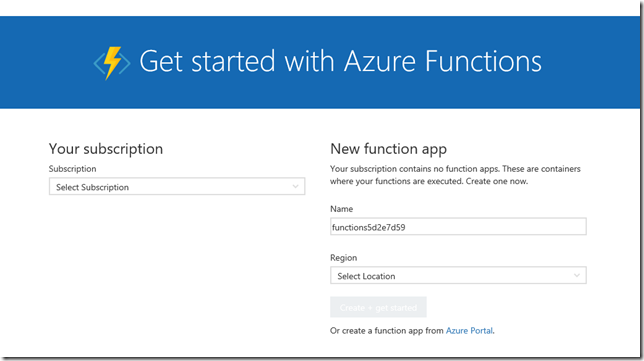
Azure Functions can be built completely in your browser or you can use traditional development tools like your favorite IDE. To get started, navigate to the following address and sign-in with your Azure account:
https://functions.azure.com/signin
If you don’t already have an Azure account setup, sign-up using the Azure Portal – once you’re in the Azure Portal, you can also create a Function by taping the New (+) option in the menu and searching for “Function App” by Microsoft in the marketplace.
Creating a Function from the functions.azure.com landing page is a quick-start experience for creating functions and is easy for quick one-off demos. If you want more control over the creation of your Function App, the Azure portal results in the same Function app being created, but gives you more control over specifying the Resource Group, Storage Account, and pricing model (dynamic vs classic).
While you’re creating a Function in the Azure portal, you might even notice that Microsoft has Functions listed under Web + Mobile – that’s because Functions are based on the core technology behind the Azure WebJobs SDK feature. Functions take what’s great about the WebJobs SDK and make it even easier to use – this is great if you’re looking to run code based off the input and output bindings that Functions make available. (For more info, check out this Stack Overflow response by Chris Anderson of Microsoft)
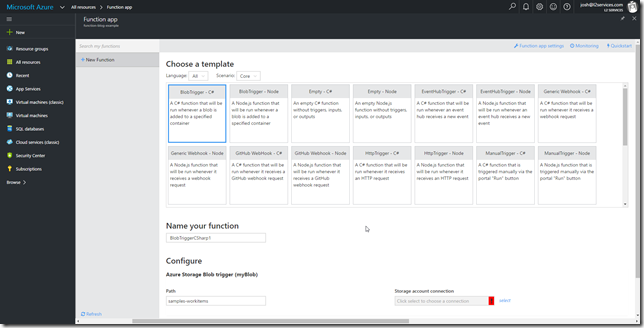
Within your Function App, you can create multiple different functions. All of these functions can run independently, but share the same Function app setts – memory, CI, authentication, CORS, etc. When creating a function through the portal, you will be presented with a number of templates to help you get up to speed quickly. These templates include small snippets of code showing how to setup a variety triggers – just make sure you try the different ‘Scenarios’ from the drop down which show some of the external integrations and some sample snippets like a Face Locator and Image Resizer.
It’s easy to get started, so try it out and refer to the Azure Functions developer documentation as you work through your first Function!


Leave a Reply