Reolink, the manufacturer of several IP camera and Network Video Recorder (NVR) products, recently released a firmware update for their line of IP cameras enabling the ability to view the camera streams through HTML 5 enabled browsers like Chrome, Firefox, Safari, and Edge.
Update: An update to the firmware seems to have established Flash as a requirement to view the streams from the browser. While this isn’t as bad as needing a proprietary plugin as was needed in old firmware, it’s still not quite as good as being completely plugin free for modern browsers.
It feels a bit odd to be excited about an IP camera that doesn’t require a browser plugin in 2016 considering browser plugins like Flash, Silverlight, and ActiveX components have died out across most parts of the web, but this is the sad reality of IP cameras where custom plugins, ActiveX components, and custom Chrome Apps are fairly standard. Mind you, if you are using your mobile phone you are probably going to prefer to use a mobile app from the vendor or even a third party app like TinyCam Pro or Blue Iris, but it’s nice to be able to pull up a browser and access your camera without having to install anything.
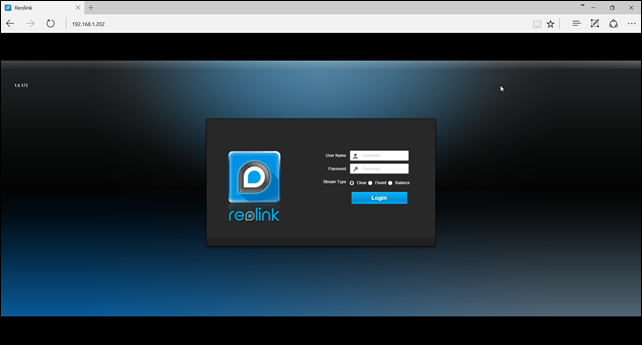
The change from the previous Reolink web based viewer is apparent right away – simply type in the IP address of your camera in your browser and you are immediately prompted to login – in previous installations, you would be presented with a hideous screen asking you to install a plugin and forcing you to use Internet Explorer. With the latest update, you can simply login and immediately start viewing the live video feed from your camera. By default, you’ll view the “Clear” stream, but you can also select to view the “Fluent” stream if you have a limited network connection or want to save on bandwidth – to do this, simply select the “Fluent” radio button before completing your login.
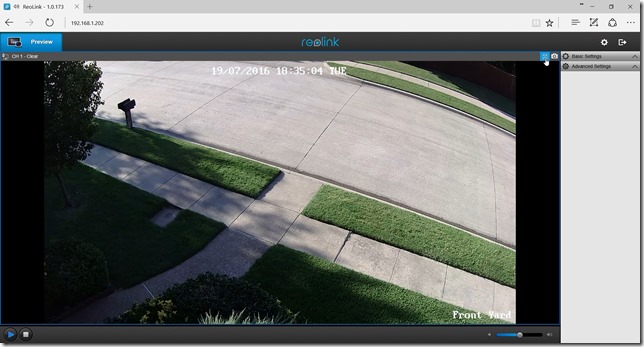
The video stream is smooth and high-quality and looks like just what you would see when using the desktop or mobile apps. In fact, the new web interface seems to mimic the Windows desktop client application in terms of the general design. The top left of the screen shows the “Preview” tab which is used for viewing the live video feed and is what you land on immediately after logging in. The video feed is immediately below and includes options for changing the view type, taking a snapshot, and playing/stopping the video feed. On the right side of the screen are a number of quick configuration options for adjusting the settings on the camera (more on this later).
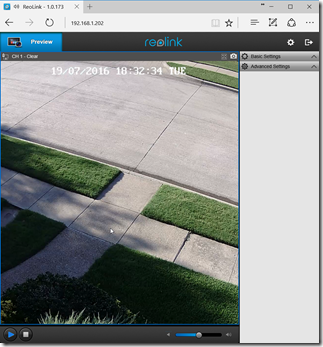
If you find that the feed is a bit stretched out, you can either adjust the dimensions of your browser to scale the video feed to fit your screen or tap the ‘view’ button on the right side of the view toolbar (above the video feed) to change between ‘stretch’ and ‘center’ options. The default stretch option will stretch the video feed to fit the screen which can resort in the video looking misshapen and distorted. The ‘center’ option matches the height of the video to the height of the space in the browser then horizontally centers the video – this works well if the action is in the middle of your screen as it can sometimes result in the sides of the video being cropped off. It would be great if Reolink also offered a ‘scale’/’fit’ option which would scale both the height and the width of the video to fit the screen, but I’ve found that I can usually find a good fit by switching between the stretch and center options depending on how I have my browser scaled.
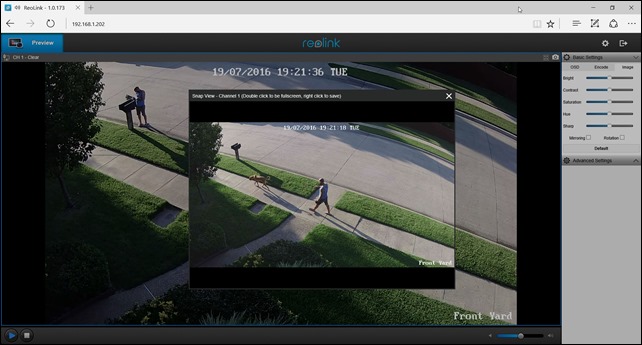
Next to the ‘view’ button, you’ll find the ‘snapshot’ button which lets you take a snapshot (picture) of the current video feed. Unfortunately, this feature take 1-2 seconds to actually take the snapshot, so if you have something you want to get an immediate snapshot of this feature might end up disappointing you. On the other hand, this is a quick and easy way to get a picture of the content currently on the screen. Once the snapshot is taken, you are given a preview which you can double-click to view full-screen or right-click to save to your computer.
The quick configuration options to the right of the video mimic the settings seen in the desktop and mobile apps and provide a way to quickly tweak the video feed. The basic settings includes the ability to adjust the On Screen Display overlay (OSD), video encoding, and image settings. The advanced settings includes adjustments for anti-flicker, exposure, white balance, day/night, backlight (dynamic range), and 3D Noise Reduction. If you’re looking for additional configuration options, click the cog icon in the top-right corner of the screen which lets you access additional features like Masks, Network Settings (including Email and FTP), Motion Triggers, Firmware Updates, Auto Reboots, and User Management.
Overall, this is a great update – there are a few small issues like the scaling of video and the delay in taking a snapshot, but the ability to access your video feeds directly in your browser without plugins is awesome!


Leave a Reply